Arquivo do mês: setembro 2014

Yama and Niyama and the Ten Commandments

Home Yoga Practice

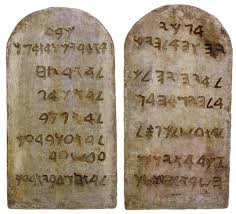
10 commandments

When I was getting my masters in psychology years ago, I wrote a great deal of my papers about yoga. I took a class called “Spiritual Dimensions of Counseling” and remember writing a paper comparing and contrasting the Yama and Niyama to the Ten Commandments of Judeo Christianity. I can remember the power of seeing the two side by side and seeing how both are more alike than different. So you can see for yourself:

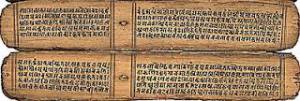
yoga sutras

Yama (Restraints)

  • Ahimsa (non-harming)
  • Satya (truthfulness)
  • Asteya (non-stealing)
  • Brahmacharya (chastity)
  • Aparigraha (non-greediness)

Niyama (Observances)

  • Saucha (Cleanliness)
  • Santosha (Contentment)
  • Tapas (Intensive spiritual effort)
  • Svadhyaya (Study of the self and scriptures)
  • Ishvara Pranidhana (Complete surrender to God)

The Ten Commandments

  1. You shall have no other gods before Me.
  2. You shall not make idols.
  3. You shall not take the name of the LORD your God in vain.
  4. Remember the Sabbath day, to keep it holy.
  5. Honor your father…

Ver o post original 199 mais palavras

Muito tempo na frente do computador? Yoga para pescoço, ombros e pulsos!

What it’s like at RIMYI (Part I)

Yama and Niyama in Asana

Home Yoga Practice

I have been on a Yama/Niyama theme lately. That is because Yama/Niyama are the true foundation of Yoga. As Iyengar says in Light on Yoga, “Practise of asanas without the backing of yama and niyama is mere acrobatics.” In the West, we have fetishized asana as “yoga” without giving the other limbs their due.

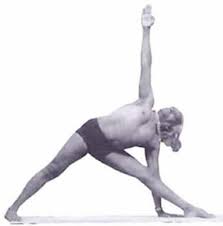
There is a popular misconception that the eight limbs are to be done sequentially. However, Iyengar taught that the limbs can be done concurrently. I will present examples on using Yama/Niyama with Asana. Here is BKS Iyengar in Utthita Trikonasna:

iyengar triangle

This is Iyengar’s pose in his prime. His arms are perfectly straight, his legs are perfectly straight, and there are three distinct triangles within his pose. In his pose, he is practicing Ahimsa (non-harming) by doing the correct actions and not injuring himself. He is practicing Satya (truthfulness) by having proper form. He is practicing Asteya (non-stealing) by…

Ver o post original 360 mais palavras

How many times does it take to do an Asana before mastery is gained?

Home Yoga Practice

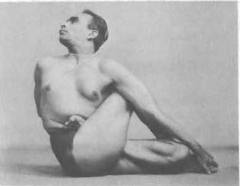
paripurna matseyandrasana

Early in my yoga practice, I was in my late 20s and fairly fit. I had picked up a copy of Light On Yoga and rushed toward the poses at the back of the book. Many disasters were had. Because I was youthful and full of ego, I went full on to trying to master the book.

Now it seems the more I do yoga, the more I go toward the front of the book to re-learn many principles that were glossed over 15 years ago. Then I realize those principles I had issues in the beginning have recurred tenfold into my later years of practice, very much like in fractal geometry where one simple pattern blows up into a chaotic and overwhelming shape.

fractal geometry

My original Yoga teacher was named Daws. He was in his late 60s at the time and did yoga at Kapiolani Park in Honolulu. He still…

Ver o post original 380 mais palavras

Padmasana (Lotus Pose)

Padmasana (Lotus Pose)

padmasana01.jpg
Padmasana (Lotus Pose)

When you see pictures of ancient yogis, most of them are shown meditating in Padmasana – पद्मासन

(Lotus Pose). This is one of the most commonly mentioned asanas as a meditative posture. Some of the other asanas that are commonly listed among meditative postures are Sukhasana (Easy Pose), Siddhasana (Adept Pose), Swastikasana and Vajrasana (Diamond Pose). These are the asanas in which you sit either for meditation or pranayama.

lakshmi-lotus02.jpg
Goddess Lakshmi

In the Hatha Yoga Pradipika (HYP), Padmasana is one of the two meditative postures described, the other being Siddhasana.

After explaining what Padmasana is, HYP (chapter 1, sutra 47) states, “This is called Padmasana, the destroyer of all diseases. Ordinary people cannot achieve this posture, only the few wise ones on earth can”. I find the statement rather intriguing as I don’t quite understand how or why wisdom has been tied to flexibility!

saraswati-padma01.jpg
Goddess Saraswati

The word padma or kamala (lotus) has been used as a symbol of beauty and charm in ancient Indian literature. Beautiful women, especially those with beautiful eyes are often compared to the beauty of a lotus flower. You can come across these common names of Indian women – Kamalakshi or Kamalanayani (both meaning “one with eyes as lovely as a lotus), Padmavati (beautiful as a lotus) and many similar names.

Many of the Indian gods and goddesses are depicted in pictures sitting on lotus flowers. Some of these pictures also show the gods/goddesses themselves sitting in Padamasana. For example, in the pictures here are shown goddess Saraswati, the goddess of arts, literature, music and learning and goddess Lakshmi, the goddess of wealth and prosperity.

How to prepare for Padmasana

butterfly-half01.jpg
Half butterfly – 1

Padmasana, in general, for most people is a challenging pose. In the olden days, before the advent of chairs and tables, people used to sit on the floor for everything. As a result, there hips, knees and ankles were naturally fairly flexible. It was easier for them to develop the capability of sitting in the Lotus pose. These days, on the other hand, we are so used to sitting in chairs, that our hips and knees become very stiff over time. As a result, it takes extra effort to develop the required flexibility to sit in Padmasana.

I am presenting below some of the asanas or stretches that can be done to open up the hips, knees and the ankles so we can start working on Padmasana.

Seated hip rotation and half butterfly

butterfly-half02.jpg
Half butterfly – 2

Step-by-step

  1. Sit on your mat with the legs stretched out in front and the spine tall and upright.
  2. Fold the right leg and place the top of the right foot on the left thigh. Try to pull the foot close to the crease of the thigh.
  3. Thread the fingers of the left hand through toes of the left foot and hold the right knee with the right hand.
  4. With the help of the right hand, start making circles at the right hip joint by gently pushing the knee forward, then down close to the floor, then pulling it backward and lifting it up, bringing the knee back to the original starting position.
  5. Continue in this manner for 5 to 6 rotations in one direction. Pause for a moment and then reverse the direction of hip rotation. Again do about 5 to 6 rotations in the other direction.
  6. After a small pause, push the right knee down with the right hand and lift it back up. Continue in this butterfly move for about 8-10 rounds. Try to keep the movement rhythmic, smooth and continuous.
  7. Now, switch over to the other side and repeat the same moves – hip rotations and half butterfly, with the other knee.
  8. In all the moves, make sure that there is no pain felt during or after the moves are completed.

Full butterfly

  1. This pose stretches both the lower back and the inner thigh and hip areas. It also gives a good stretch to the knee joints.
  2. Join the soles of the feet together and pull the heels as close to the body (the pelvis) as comfortable.
  3. Join the hands together and interlock the fingers across the toes of the feet. This is called Baddha-konasana (bound angle pose).
  4. Holding the toes, lean the body forward, keeping the spine elongated. With the arms, you may attempt to push the legs and the knees down toward the floor. Hold the position for 4-5 breaths and come back to the original position with the spine vertical.
  5. Keeping the spine upright and tall, begin to make gentle, rhythmic moves with the knees up and down. The objective is to try to bring the knees as close to the floor as possible without causing any pain.
  6. Repeat the butterfly moves for about 8-10 times. Pause for a couple of breaths and then repeat the same moves one more time 8-10 times.

Seated cradle moves

Step by step

  1. Sit on your mat with the legs stretched out in front and the spine tall and upright.
  2. Fold the right leg and place the sole of the right foot on the inside of the left elbow. Wrap the right arm around the right knee and hold the left hand. Try to pull the foot and the right leg upwards and as close to the chest as possible.
  3. In this position, gently begin to rock the body side to side, as if rocking the cradle of an infant.
  4. Pause after 5-6 rotations. Repeat the above moves with the other leg also 5-6 times.

Kapotasana (Pigeon Pose)

Kapotasana is an excellent pose for developing flexibility in the hips and the knees. Please visit my earlier blog post on this asana where I have discussed the procedure in detail.

Practicing the Lotus Pose (Padmasana)

ardhapadmasana
Ardha Padmasana (Half Lotus)

Before getting into the full lotus, it is a good idea to attempt the half lotus for some time.

  1. Start in the cross-legged seated position. Lifting the right leg with the hands, position the right foot on top of the left thigh. Try to bring the heel in close to the groin area with the toes extending slightly beyond the right thigh, if comfortable. The left foot remains positioned under the right thigh, as in Sukhasana (comfortable pose). Allow both the knees to release closer to the floor.
  2. After staying in the pose for about 5-6 breaths, reverse the position of the feet and stay in the half lotus on the other side for 5-6 breaths.
  3. To practice the full lotus, with the left foot still on top of the right thigh, bring the right foot out from under the thigh and position it on top of the left thigh. In the final position, the effort is to bring both the knees down close to the floor. Try to keep the spine erect and vertical, if possible. Relax the hands in your lap, one palm resting on the other. Alternately you can place the hands on the knees in what is called the “chin-mudra”, with the index finger and the thumb touching and the palm facing up.
  4. Stay in the pose for 8-10 breaths and then switch the legs around and sit in Padmasana on the other side for 8-10 breaths.
  5. As in the practice of any asana, it is imperative that you don’t over-stretch any part of the body. As mentioned above, this can be an intense pose for someone with tight hips, knees or ankles. By practicing the preparatory poses given above, try to build the capability to sit in Padmasana gradually.
  6. Over a period of time, you can build the capacity to sit in the pose for the entire duration of your pranayama/meditation practice.

Benefits

  • As per Hatha Yoga Pradipika, practicing Padmasana can relieve us from all ailments – physical, mental, emotional etc.
  • The pose helps stabilize the body. It is a perfect pose for meditation as the spine naturally tends to stay erect in the pose.
  • The pose helps develop calmness of the mind and reduce stress levels.
  • Due to the restricted blood flow to the legs, there is additional blood available to tone the abdominal and pelvic area.

Contraindications and cautions

  • Avoid the pose if you any kind of ankle, knee or hip injury.
  • Practice the preparatory poses mentioned above regularly to develop the flexibility required for Padmasana.

Handstand

Handstand


BY YJ EDITOR  |  AUG 28, 2007


Like its inverted cousins such as Forearm Balance and Headstand, a major obstacle to Handstand is a natural fear of falling. So the basic pose will be described with the heels supported against a wall. Make sure that there are no hanging pictures or other decorations on the wall directly above you.


(ah-doh moo-kah vriks-SHAHS-anna)

adho mukha = face
downward (adho = downward; mukha = face)
vrksa = tree

Step by Step

Perform Adho Mukha Svanasana (Downward-Facing Dog Pose) with your fingertips an inch or two away from a wall, hands shoulder-width. If your shoulders are tight, turn your index fingers out slightly; otherwise arrange them parallel to each other. If you’re uneasy about this pose, you’re not alone. To ready yourself for and secure yourself in this inversion, firm your shoulder blades against your back torso and pull them toward your tailbone. Then rotate your upper arms outward, to keep the shoulder blades broad, and hug your outer arms inward. Finally spread your palms and press the bases of the index fingers firmly against the floor.


Now bend one knee and step the foot in, closer to the wall (we’ll say it’s the left leg), but keep the other (i.e. right) leg active by extending through the heel. Then take a few practice hops before you try to launch yourself upside down. Sweep your right leg through a wide arc toward the wall and kick your left foot off the floor, immediately pushing through the heel to straighten the left knee. As both legs come off the ground, engage your deep core abdominal muscles to help lift your hips over your shoulders. Hop up and down like this several times, each time pushing off the floor a little higher. Exhale deeply each time you hop.

Hopping up and down like this may be all you can manage for now. Regularly practice strengthening poses, like Adho Mukha Svanasana and Plank Pose. Eventually you’ll be able to kick all the way into the pose. At first your heels may crash into the wall, but again with more practice you’ll be able to swing your heels up lightly to the wall.

If your armpits and groins are tight, your lower back may be deeply arched. To lengthen this area, draw your front ribs into your torso, reach your tailbone toward your heels, and slide your heels higher up the wall. Squeeze the outer legs together and roll the thighs in. Hang your head from a spot between your shoulder blades and gaze out into the center of the room.

To start stay in the pose 10 to 15 seconds, breathing deeply. Gradually work your way up to 1 minute. When you come down, be sure not to sink onto the shoulders. Keep your shoulder blades lifted and broad, and take one foot down at a time, each time with an exhalation. Stand in Uttanasana for 30 seconds to 1 minute. We tend to kick up with the same leg all the time: be sure to alternate your kicking leg, one day right, next day left. 

YOGAPEDIA

Watch Tara Stiles Prep for Balance in Handstand

How to Prep for Balance in Handstand by Tara Stiles

7 Steps to Defy Gravity and Master Handstand by Alexandria Crow

Why Athletes Should Be Doing Handstands by Sage Rountree

Challenge Pose: Handstand by Kathryn Budig

Challenge Pose: Bent-Knee Handstand Pike by Kathryn Budig

Q&A: How Can I Overcome My Fear of Handstand?


Pose Information
Sanskrit Name
Adho Mukha Vrksasana
Pose Level
1
Contraindications and Cautions
  • Back, shoulder, or neck injury
    • Headache
    • Heart condition
    • High blood pressure
    • Menstruation

    If you are experienced with this pose, you can continue to practice it late into pregnancy. Don’t, however, take up the practice of Adho Mukha Vrksasana after you become pregnant.

Modifications and Props
One way to modify Handstand is to brace the crown of your head against a padded support placed on the floor between your hands. A supported head stabilizes your position and is a great confidence booster. But getting exactly the right height can be tricky: if the height is too low, your head won’t be braced; if it’s too high, your neck will get scrunched. Use a yoga block for a base, then pile two or more folded blankets (or a bolster) on top. How high you build the support will depend on the height and the length of your arms. Experiment with different heights until you feel like you have the right one, then position your hands on the floor to either side of it. Walk in from Adho Mukha Svanasana until you can brace your crown on the support and the back of your head against the wall. Then follow the instructions above for moving into the pose.
Deepen the Pose
Lifting the head to look at the floor is an advanced movement. Be sure not to jam the base of your skull into the back of your neck. Imagine as you lift your head that someone is holding a softball against the nape of your neck. This will help maintain the cervical curve. Also, to lift your head, initiate the movement by pressing your shoulder blades more deeply into your back. Brace your crown against the wall. Then take one heel away from the wall and strongly extend it toward the ceiling. Bring that heel back to the wall and do the same with other. Finally try to take both heels off the wall and balance with only your crown against the wall.
Preparatory Poses
Follow-up Poses
Beginner’s Tip
Many beginners find it difficult to keep their elbows straight in this pose. Buckle a strap and loop it over your upper arms, just above your elbows. Extend your arms straight out in front of you at shoulder width and adjust the strap so that it is snug against your outer arms. Then use the strap in the pose, but think of pushing the arms slightly in, away from the strap, rather than letting them bulge out into the strap.
Benefits
  • Strengthens the shoulders, arms, and wrists
  • Stretches the belly
  • Improves sense of balance
  • Calms the brain and helps relieve stress and mild depression
Partnering
A partner can help you get a feel for the movement of the tailbone. Position her in front of you as you’re in the pose. Have her wrap her arms around your pelvis, gripping one wrist in the opposite hand, and cradle the sacrum. Then she can pull the back of your pelvis up, lifting your tailbone toward your heels.
Variations
You can vary this pose by placing your hands in different positions. For example, you can narrow your hands inside shoulder width, which decreases your base of support and so develops your sense of balance. Or you can turn your hands outward, which will teach you how to externally rotate the upper arms.

One-Legged King Pigeon Pose

One-Legged King Pigeon Pose


BY YJ EDITOR  |  AUG 28, 2007


The full pose, which is suitable for intermediate students, will be described in the Full Pose section below. First we’ll practice the leg position only, which should be accessible to most experienced beginners.

(aa-KAH pah-DAH rah-JAH-cop-poh-TAHS-anna)
eka = one
pada = foot or leg
raja = king
kapota = pigeon or dove

Step by Step

Begin on all fours, with your knees directly below your hips, and your hands slightly ahead of your shoulders. Slide your right knee forward to the back of your right wrist; at the same time angle your right shin under your torso and bring your right foot to the front of your left knee. The outside of your right shin will now rest on the floor. Slowly slide your left leg back, straightening the knee and descending the front of the thigh to the floor. Lower the outside of your right buttock to the floor. Position the right heel just in front of the left hip.


The right knee can angle slightly to the right, outside the line of the hip. Look back at your left leg. It should extend straight out of the hip (and not be angled off to the left), and rotated slightly inwardly, so its midline presses against the floor. Exhale and lay your torso down on the inner right thigh for a few breaths. Stretch your arms forward.

Then slide your hands back toward the front shin and push your fingertips firmly to the floor. Lift your torso away from the thigh. Lengthen the lower back by pressing your tailbone down and forward; at the same time, and lift your pubis toward the navel. Roll your left hip point toward the right heel, and lengthen the left front groin.

If you can maintain the upright position of your pelvis without the support of your hands on the floor, bring your hands to the top rim of your pelvis. Push heavily down. Against this pressure, lift the lower rim of your rib cage. The back ribs should lift a little faster than the front. Without shortening the back of your neck, drop your head back. To lift your chest, push the top of your sternum (at the manubrium) straight up toward the ceiling.

Stay in this position for a minute. Then, with your hands back on the floor, carefully slide the left knee forward, then exhale and lift up and back into Adho Mukha Svanasana (Downward Facing Dog Pose). Take a few breaths, drop the knees to all-fours on another exhalation, and repeat with the legs reversed for the same length of time. 

Pose Information
Sanskrit Name
Eka Pada Rajakapotasana
Pose Level
1
Contraindications and Cautions
  • Sacroiliac injury
  • Ankle injury
  • Knee injury
  • Tight hips or thighs
Modifications and Props
It’s often difficult to descend the outside of the front-leg hip all the way to the floor. Place a thickly folded blanket underneath the hip for support.
Deepen the Pose
Your partner can help with the lift of the arms. Perform the pose to your capacity, whether your hands are grasping the foot or a strap. Have your partner stand behind you. He should press his hands against your outer upper arms, just above the shoulder, and lift the outer arms toward the elbows. Release your side ribs down, away from the arms. Keep the tops of your shoulders soft. The full pose, which is suitable for intermediate students, will be described in the Full Pose section below. First we’ll practice the leg position only, which should be accessible to most experienced beginners.
Theraputic Applications
  • Urinary disorders
Preparatory Poses
Follow-up Poses
Eka Pada Rajakapotasana is actually the first in a series of four, increasingly difficult Pigeon poses. In each of the three successive poses, the forward leg is placed in a slightly different position. In the second variation the forward foot is standing on the floor just in front of the same-side buttock, with the knee angled well forward of the heel. In the third variation the forward leg is in Ardha Virasana, while in the fourth the leg is stretched straight forward (as in Hanumanasana or Monkey Pose) of the pelvis.
Beginner’s Tip
At first many students who learn this pose aren’t able to easily grasp the back foot directly with their hands. Take a strap with a buckle. Slip a small loop over the back foot—let’s say the left foot is extended back—and tighten the strap around the ball of the foot. Make sure the buckle is against the sole of the foot. Perform the leg position, and lay the strap on the floor along side the left leg. Bend the left knee and grasp the strap with the left hand. Swing that arm up and over your head, then reach back with the right hand. Hold the strap in both hands, and carefully walk your hands down the strap toward the foot.
Benefits
  • Stretches the thighs, groins and psoas, abdomen, chest and shoulders, and neck
  • Stimulates the abdominal organs
  • Opens the shoulders and chest
Partnering
Your partner can help with the lift of the arms. Perform the pose to your capacity, whether your hands are grasping the foot or a strap. Have your partner stand behind you. He should press his hands against your outer upper arms, just above the shoulder, and lift the outer arms toward the elbows. Release your side ribs down, away from the arms. Keep the tops of your shoulders soft. The full pose, which is suitable for intermediate students, will be described in the Full Pose section below. First we’ll practice the leg position only, which should be accessible to most experienced beginners.
Did You Know?
For the full pose, first perform the preliminary leg position. Then with your hands braced on the floor, bend the back knee and bring the foot as close to the top of your head as possible. Inhale, stretch the right arm upward; then exhale, bend the elbow, and reach back and grasp the inside of the left foot. After a few breaths, reach back with the left hand and grasp the outside of the foot. Draw the sole of the foot as close as possible to the crown of your head. Hold this position for 30 seconds. Then release the foot, lower the leg, perform step 5 to change the position of the legs and repeat on the second side for the same length of time.

Root Cause of Stress

Root Cause of Stress

Root Cause of Stress

stress01.jpg
Stress

One of the most common reasons why people join yoga classes is to learn how to deal with day-to-day stress.

Here are a few definitions of stress:

“Stress is a physiological response to any change, whether good or bad, that alerts the adaptive fight or flight response in the brain and the body.”

“Feeling overwhelmed or negatively challenged by a circumstance or an event that places a demand on the body, mind and/or emotions that is perceived as beyond our ability to handle.”

“The body’s response to any demand, when forced to adapt to change.”

The modern fast-paced lifestyle puts a lot of demands on the mind and body. We convert these to mental stress as we find ourselves unable to deal with these rapidly changing events and situations. As you can see, the main cause of what we perceive as stress is our inability to deal with the event or situation that we are presented with at any given time.

If you do a google search on stress, you will find a multitude of articles with titles like:

  • Managing stress
  • Coping with stress
  • Handling stress
  • “x number of ways” to deal with stress
  • Eliminating stress
  • … etc.

The list goes on… Most of the material presents ways to “treat the symptoms” which is not unlike how any other ailment is treated by modern medicine.

However, you don’t find too many references giving us a deep look at what causes stress in the first place. After all if we want to treat an ailment, the best way is to uproot the very root cause of the ailment.

We all know that stress originates in the mind. It then manifests in multiple physical, physiological and mental problems. For example, many of my students tell me that stress for them manifests as pain in the shoulder or neck or the back etc. At a deeper level, stress has been identified as the cause for more serious ailments like blood pressure, heart problems, diabetes etc.

But the key factor to remember is that the origin of stress is in the mind. Mind is where the stress is being created. The next question is “whose mind are we talking about?” If I am feeling stressed, then it is my mind where the stress is happening. If it is my mind, I need to learn how to take control of the mind. In order to take control, I need to understand the functioning of the mind. It is, therefore, apparent that in order to understand stress we need to first develop a deeper understanding of the mind itself.

stress02.jpg
Stress, all in the mind

To understand the mind, we turn to our revered teacher, Sage Patanjali, who gave us the art and science of yoga in his “Yoga Sutras”. In the very second sutra, Patanjali defines yoga as “control of the fluctuations of the mind-field”. As we observed earlier, stress is something that originates in the mind field. In that sense, it is a fluctuation in the mind. Since yoga is learning how to control the fluctuations of the mind, then, by its very definition, yoga is effectively stress management.

In the Yoga Sutras, Patanjali provides us an in-depth understanding of the functioning of the mind. In a previous article, I had discussed the way the mind functions. A quick review of that article will help you understand the cause of stress presented here better.

As discussed in the article referenced above, the mind can be thought of as being a composite of four functions – cognitive, intellect, ego and memories.

It is the memory where we store all the past impressions, called “samskaras”. All our actions, reactions, thoughts, behavior patterns, emotions etc. get recorded in the memory. As per yoga philosophy, these impressions are not just from this life but also from previous lives. This memory contains what we like, what we dislike, what we fear etc. When we are confronted with a situation, we find a match with what is stored in the samskaras. If the pattern matches with what we like, we become happy; if the pattern matches with what we dislike, we become unhappy, angry, jealous or greedy etc. Again, as I explained in the article referenced earlier, all this pattern matching and the subsequent feelings and emotions that erupt in the mind are controlled by the ego. It is the ego which loves to dwell in the past or in the future which is nothing but an extrapolation of the past.

For example, let us say we meet a person for the first time. His face seems to resemble someone that in our memory is stored as a bad memory. Without knowing anything about the person, we instantly develop a dislike for the person. Any interaction with that person from then on is overshadowed by that inherent dislike and we judge everything based on that negative image.

This is a simplistic example of what goes on in the mind for every situation that we come up with. The result is that we are unable to deal with a situation as it “really” is since the ego forces us to see it through the previously colored lens of past memories.

In the light of the above, most situations in life seem threatening to us since we have already labeled them as unpleasant or disagreeable. This is what causes what is called the “flight or fight” response from the system. We have already been “pre-programmed” to become tense in most situations. This tension is what we call stress.

Stress, as we know, is the cause for most of the common ailments that we are afflicted with these days. They include even more serious ailments like hypertension, heart problems, digestive disorders, and even diabetes and cancer.

In summary I would like re-emphasize that the cause of stress lies in our own mind. In general we tend to point our finger at others as being the cause of stress. We are fond of saying that the boss or the colleagues or the spouse or the kids cause stress. Not only people, but even simple situations like the traffic light turning red when we are in a hurry can cause stress. All this, as explained above, is caused by our reaction based on pre-programmed responses that are stored deep in our subconscious mind as samskaras.

Understanding the root cause of stress is the first major step in learning how to cope with or manage stress. I will talk more about how yoga helps in alleviating stress in a future article.
Jake Clennell on Filming BKS Iyengar: ‘I have never in my life seen such an expression of love and devotion.’

Jake Clennell on Filming BKS Iyengar: ‘I have never in my life seen such an expression of love and devotion.’

in YD News

bks-iyengar-jake clennell

The yoga world is still mourning the death while celebrating the life of yoga master B.K.S. Iyengar who passed away August 20 at 95. Senior Iyengar teacher Bobby Clennell recently spoke with her son, filmmaker Jake Clennell, over the phone about his experience as a child tagging along to India with his parents, and what it was like to film Guruji for ‘Sadhaka’, a new documentary film about the life and teaching of B.K.S. Iyengar. The following are Jake’s words. 

Overall, I would say I have spent, on and off since age five, two years studying at the Ramamani Iyengar Memorial Yoga Institute (RIMYI), Pune. During that time, I took many photos of Mr. Iyengar and with my father (Lindsey Clennell) I remember shooting some film of him, too. I always wanted to make a great film about Guruji.

Finally on his 90th birthday, Lindsey and I knew we had to make a start. It was too much of a significant occasion to miss. After that I started following him around with the camera. Then finally we took a deep breath, and formally asked Guruji’s permission to make a documentary film about him. He said yes, but qualified his yes with, “But don’t follow me, follow my students,” which seemed a tad disappointing at the time. If Guruji suggests something, you do it, added to which, it’s probably a good idea. So I did just that – I filmed a number of Indian senior teachers and their students. One young student who attends the RIMYI high school in Bellur, the school built by Guruji in the village where he was born and raised, was truly inspirational. Through filming her it became very clear to me the impact that his teaching has on people’s lives.

As a filmmaker, I wasn’t interested in showing the vast scope of his work, his global impact, or how many teachers he had trained. Plus, I wasn’t interested in making a propaganda piece, listing all of his awards or showing library footage from the past. I wanted to show how vibrant he was at this age.

I was always very careful when I was filming him to keep it professional. The Iyengar family work hard and they appreciated that I was also focused and working hard. I showed him some footage and it made me very happy to have the opportunity to go over it with him, sitting with him in his library while he viewed the images on my laptop. It gave him confidence in the project. It was after I showed him that footage that he gave me free reign to film him more intimately.

After all of that work  – I spent weeks and weeks in each location – I got to shoot intimate material. It happened mostly in the asana hall. I had already covered plenty of “National Geographic” shots of him in temples and so on but what is really interesting, and what he really does is, teach people and reach people through their bodies. From a filmmaker’s point of view, and also as somebody who has spent a long time watching him as a kid, I wondered how that would come across on film as it such a subtle, yet sophisticated thing that he’s doing.

Some of the most incredibly touching scenes I filmed were of the small group of teachers and students who arranged his props for him in the asana hall each morning. They were extremely familiar with Guruji’s practice. There was a weekly order to it. In his 90s, his practice would involve a lot of precisely placed props.

[Ed. note from Bobby: Jake starts to cry as he remembers this incident. Then I start to cry as I am, listening back, transcribing his words.]

I have never in my life seen such an expression of love and devotion. As those teachers assisted him, the intensity of the moment – it was just so beautiful. The care they showed this body that had been through so much experimentation in the service of others. His body at the end was like a massive treasure trove, a vast repository of experience and wisdom and those around him knew it without a shadow of a doubt. There was no confusion amongst those around him as to who and what he was.

One day he was doing Kapotasana (Pigeon Pose) supported through a chair. He reached for a prop. One of his helpers, Raya, who was practicing Padmasana (Lotus Pose) in Sirsasana (Headstand) nearby, swiftly unwound his legs, rolled out of the pose, slid across the floor and got an extra blanket for Guruji. The whole action, from the moment Guruji’s hand twitched, to the moment Raya touched Guruji’s hand with the blanket took hardly one second.

SADHAKA: the yoga of B.K.S. Iyengar is a feature documentary film about BKS Iyengar’s practice, life and influence from award winning director, Jake Clennell. The film is currently in post–production editing. Watch the extended trailer below and consider making a donation to help finish the film. 

——

Earlier